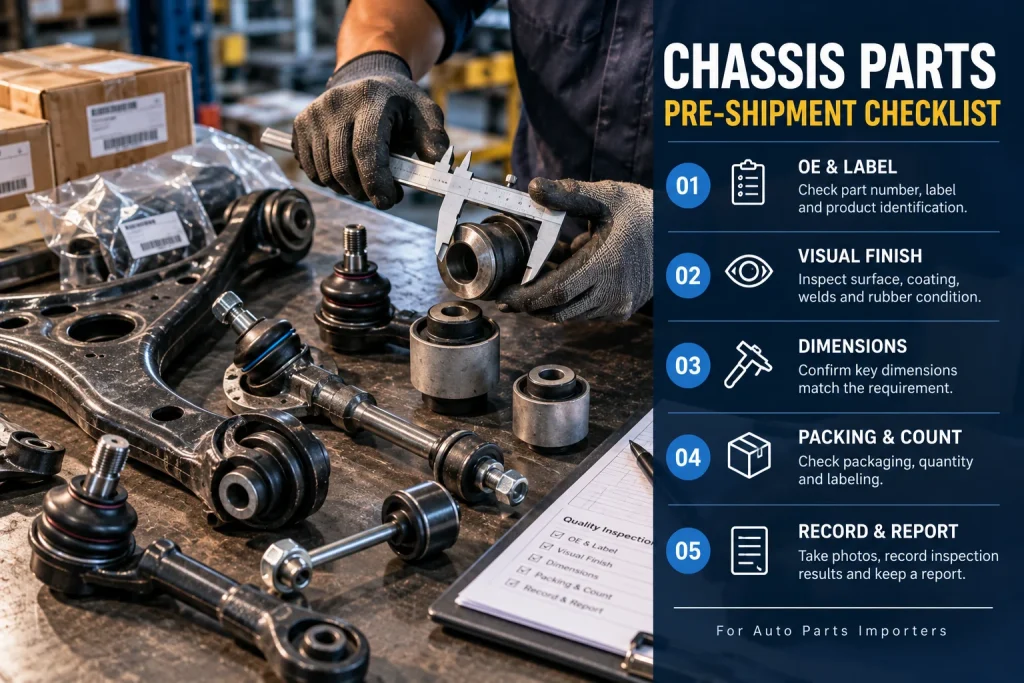
Chassis Parts Quality Inspection Checklist for Importers
A carton can look fine from the outside. Open it, and the problem may be right there: a torn ball-joint boot, two different part-number labels, or a control arm that does not match the approved sample. By the time a shipment reaches an importer’s warehouse, fixing that mistake takes much more work.
Chassis parts deserve a careful check because small differences can cause fitting problems, returns and customer complaints. You do not need an expensive laboratory for every basic check. You do need a clear reference, an agreed inspection plan and good records.
Before Inspection: Agree on the Correct Part
Start with the purchase order and the approved product information. Confirm the OE reference, vehicle application, front or rear position, left or right side where relevant, and required quantity. Keep an approved drawing or physical sample if the product has similar-looking versions. An OE number alone is not always enough. Our guide to checking OE numbers before ordering explains why.
Also agree with the supplier on which items will be checked, how many pieces will be sampled, the acceptance criteria and who will handle any problems. The points below are a practical starting list, not a universal technical standard.
A 10-Point Chassis Parts Quality Inspection Checklist

Insert the 10-point inspection infographic here.
Use this list for common suspension and steering items such as control arms, bushings, ball joints and tie rods. Adapt it to the specific part and your agreed specifications.
1. Surface and Appearance
Look for visible cracks, bent sections, damage, heavy scratches, rust and uneven coating. A small cosmetic mark may be acceptable; a bent mounting point is a different matter. Photograph anything that needs a decision.
2. Rubber Bushings
Check the rubber for tears, splits, obvious deformation or separation from the metal sleeve. Confirm that the bushing is the correct design and is seated as specified. Appearance alone cannot prove rubber hardness or long-term durability.
3. Ball Joints and Dust Boots
Check that the boot is seated properly and has no visible cuts or damage. Look for signs of grease leakage. Any movement or functional check should follow the product-specific method agreed with the supplier; do not use guesswork as a pass/fail rule.
4. Threads and Supplied Hardware
Inspect threaded studs for crushed or damaged threads. Check that supplied nuts, washers and other hardware match the agreed packing list. Do not force a mismatched nut onto a stud to make it fit.
5. Critical Dimensions
Measure only the dimensions that matter to that part: hole spacing, sleeve diameter, mounting width or overall length, for example. Compare measurements with an approved drawing or reference sample, not a number taken from a similar-looking product.
6. Materials, Finish and Markings
Confirm required markings, protective finish and surface condition against the agreed specification. If material grade, coating thickness, rubber hardness or strength is critical, request appropriate test evidence. A visual check cannot verify those properties.
7. Packaging and Labels
Open sample cartons. Make sure the parts are protected against rubbing, impacts and damage to rubber boots. Check that box labels match the purchase order and that the part numbers remain readable after shipping and storage.
8. Quantity and Mixed-SKU Orders
Check carton counts, quantities per box and SKU separation. For mixed shipments, confirm that similar left/right parts or different OE references have not been packed together under one label.
9. Consistency Between Samples
Compare selected pieces from different cartons with each other and with the approved sample. Differences in finish, bushings, markings or included hardware deserve a closer look. Ask for batch details when traceability is important.
10. Photos, Results and Follow-Up
Record what was checked, how many pieces were examined, measurements, photos and any exceptions. Mark unresolved problems clearly and agree on the next action with the supplier before approving shipment. A checked box without evidence is not much help later.
What a Visual Inspection Cannot Confirm
A neat surface does not prove correct steel grade, fatigue strength or rubber life. Some requirements call for material certificates, dimensional reports, functional tests or independent inspection. Ask for the evidence that matches the product risk and the purchase agreement. The right level of testing depends on the part and the order.
Keep the Inspection Process Practical
For a first order, begin with a clear sample and written acceptance points. For repeat orders, compare the new batch with earlier approved goods. If something changes, ask why before shipping.
You can use our auto parts supplier evaluation guide when reviewing a new source, and read how to reduce avoidable returns before shipping.
Before You Place Your Next Order
A useful inspection checklist is not about making paperwork longer. It is about knowing what you ordered, seeing what is being shipped and having enough evidence to resolve a problem early.
Looking for control arms, bushings, ball joints or related parts? Browse the JASPEEDA product catalog. To discuss an order, send us your OE list, required quantities and destination. Product specifications, inspection requirements and availability should be confirmed before quotation or shipment.